Adding a Boarder...
Posted: May 24th, 2010, 10:08 pm
As the title says....
How to Add a Boarder!
Step 1:
Open your image in photoshop
Remember to make sure your colours are Black over White to Start with.
Step 2:
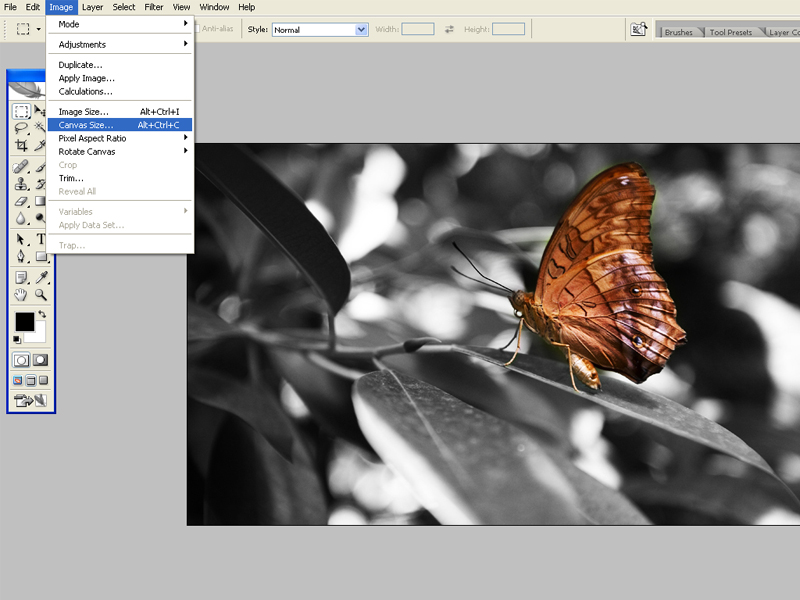
Image > Canvas Size Click, Canvas size window will open.
Step 3:
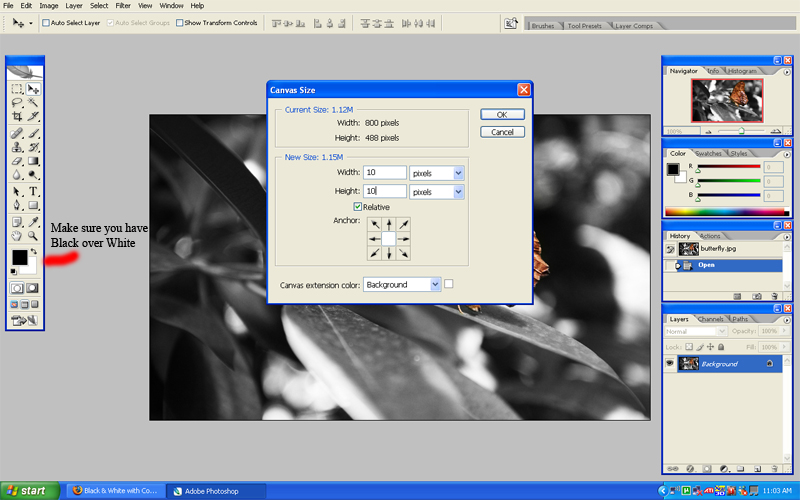
Click on Relative (just under the height txt box) Change Inches to Pixels, Enter 10pixels for both width and height. click OK (this will add a white strip to your canvas.)
Step 4:
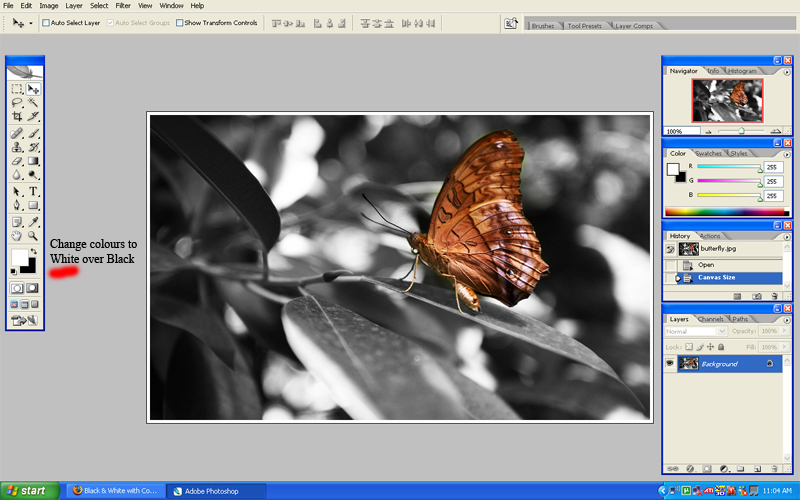
Change your colours to White over Black. This will give you a black strip over the white one.
Step 5:
Once the Canvas size box opens, Change Inches to Pixels enter 20pixels to width and height. click ok
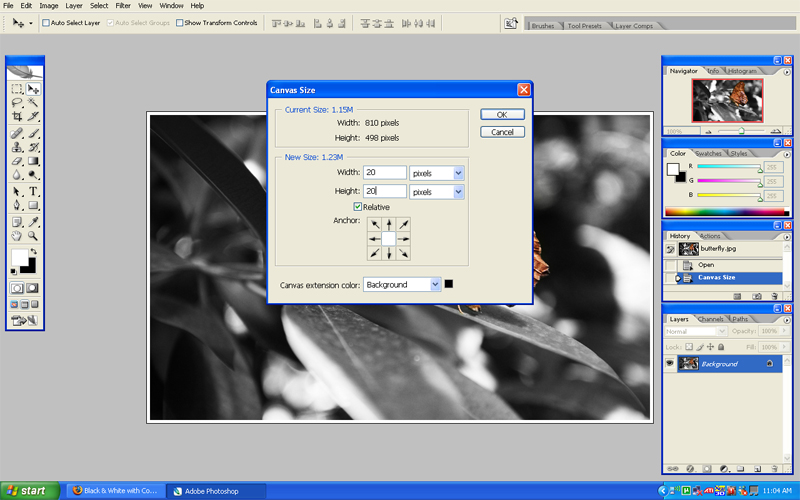
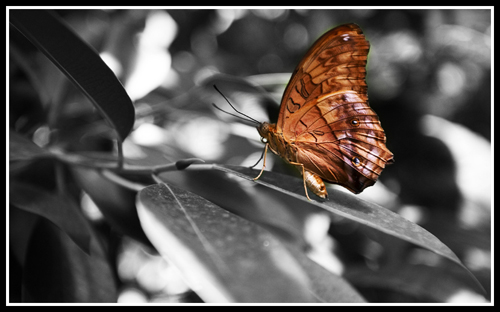
End Result will look something like this.
How to Add a Boarder!
Step 1:
Open your image in photoshop
Remember to make sure your colours are Black over White to Start with.

Step 2:
Image > Canvas Size Click, Canvas size window will open.

Step 3:
Click on Relative (just under the height txt box) Change Inches to Pixels, Enter 10pixels for both width and height. click OK (this will add a white strip to your canvas.)
Step 4:
Change your colours to White over Black. This will give you a black strip over the white one.

Step 5:
Once the Canvas size box opens, Change Inches to Pixels enter 20pixels to width and height. click ok

End Result will look something like this.
